Articles23 min read

Scissor Skills Activities for Preschoolers: Age-by-Age Guide with Free Printables

Help your preschooler master scissor skills with this age-by-age guide featuring 30+ fun activities, free printable worksheets, and expert tips from occupational therapists.

Scissor Skills Activities for Preschoolers: Age-by-Age Guide with Free Printables

I watched my daughter grip a pair of safety scissors for the first time at her preschool's fine motor station. She squeezed the handles together, produced a single ragged snip in a strip of construction paper, and held up the tiny confetti piece like a trophy. That one snip represented months of hand-strengthening, bilateral coordination, and visual-motor development that most adults take for granted every time they open a bag of chips.

Scissor skills are one of the most complex fine motor tasks preschoolers learn. A child must coordinate both hands doing different jobs — one holding the paper steady, the other opening and closing the blades — while tracking a line with their eyes and adjusting their grip in real time. It is no wonder many children find it frustrating at first.

This guide breaks scissor skill development into age-based milestones, gives you 30+ hands-on activities organized by difficulty, and addresses the questions most resources skip: what to do when your left-handed child struggles, how to fix common cutting problems, and what red flags suggest your child might benefit from occupational therapy support. Whether you are a parent working at the kitchen table or a teacher setting up a classroom fine motor center, you will find activities you can start today.

Why Scissor Skills Matter for Preschoolers

Cutting with scissors is not just an art activity. It is a whole-body developmental exercise disguised as a craft. When a preschooler uses scissors, several critical systems work together:

  • Bilateral coordination. Both hands perform different tasks simultaneously — the non-dominant hand rotates and steadies the paper while the dominant hand operates the scissors. This "two hands, two jobs" pattern is the same one used for tying shoes, buttoning a shirt, and holding a paper while writing.
  • Hand strength and finger dexterity. The repetitive opening and closing motion strengthens the intrinsic muscles of the hand — the same muscles that control pencil grip. Occupational therapists consistently rank scissor activities among their top recommendations for building handwriting readiness.
  • Visual-motor integration. Following a line with scissors requires the eyes to guide the hands with precision. This eye-hand coordination transfers directly to writing letters, drawing shapes, and copying from a whiteboard.
  • Focus and motor planning. Cutting along a path requires sustained attention and the ability to plan a sequence of movements — start at the bottom, follow the line, stop at the end. These executive function skills are foundational for academic tasks.

Research published in the American Journal of Occupational Therapy found that scissor skills in preschool are a stronger predictor of kindergarten writing ability than pencil grip alone. Children who could cut along curves and angles by age 5 scored significantly higher on handwriting assessments. The message is clear: cutting practice is writing practice.

For a broader look at hand-strengthening activities, see our fine motor skills activities for kids and our dedicated cutting practice worksheets guide.

Scissor Skills Milestones by Age

One of the most common questions parents ask is whether their child's scissor skills are on track. The answer depends on age, hand dominance, and exposure. Here is a developmental roadmap with measurable indicators at each stage.

Ages 2-3: Snipping and Exploring

The earliest scissor experiences are about exploration, not precision. Two-year-olds are learning that scissors open and close, that squeezing produces a cut, and that the result is exciting.

What to expect:

  • Holds scissors with both hands or uses a fist grip
  • Makes single snips on thin paper, playdough, or straws
  • Cannot yet cut along a line — cuts are random
  • Interest is sporadic; sessions last 2-5 minutes

Measurable milestones by age 3:

  • Uses one hand to hold scissors (hand preference may not be established yet)
  • Makes several consecutive snips along the edge of a paper strip
  • Can snip through playdough "snakes" and thin materials
  • Follows basic safety rules (scissors stay at the table)

Best activities for this age: Snipping playdough snakes, cutting drinking straws into beads, making confetti from scrap paper, snipping along the edge of a paper plate fringe.

Ages 3-4: Straight Lines and Simple Shapes

Between three and four, most children develop a clear hand preference and begin to control the direction of their cuts. This is when structured cutting activities become productive.

What to expect:

  • Established hand dominance for cutting (may still switch for other tasks)
  • Cuts along thick straight lines with moderate accuracy
  • Can stop cutting at a designated endpoint
  • Begins to turn the paper (rather than the scissors) to change direction

Measurable milestones by age 4:

  • Cuts along a 6-inch straight line staying within ½ inch of the target
  • Cuts a piece of paper in half along a bold line
  • Makes a fringe by cutting parallel lines along a strip edge
  • Holds scissors with thumb on top (thumbs-up position) most of the time

Best activities for this age: Cutting strips along bold lines, fringing paper edges, cutting out simple rectangular pictures, straight-line cutting paths with stopping points.

Ages 4-5: Curves, Corners, and Complex Shapes

This is the stage where cutting becomes a tool for creative projects. Four-year-olds can follow curves, manage corners, and cut out shapes that they then use in art activities.

What to expect:

  • Smooth, controlled cutting along gentle curves
  • Can navigate corners by pausing and turning the paper
  • Begins cutting out circles, squares, and triangles
  • Shows patience for multi-step cutting projects

Measurable milestones by age 5:

  • Cuts a circle with a 4-inch diameter staying within ¼ inch of the line
  • Cuts out a square and a triangle independently
  • Cuts along zigzag lines with direction changes
  • Uses scissors efficiently for craft projects (cutting out pieces for collage)

Best activities for this age: Cutting circles and ovals, zigzag paths, cutting out animal and shape templates, cut-and-paste crafts with multiple pieces.

When to Seek Help — Red Flags by Age Group

Scissor skills develop on a continuum, but certain signs suggest a child may benefit from an occupational therapy evaluation:

At age 3:

  • No interest in or attempt to use scissors after repeated opportunities
  • Cannot make a single snip with adapted (spring-loaded) scissors
  • Avoids all fine motor activities (not just scissors)

At age 4:

  • Consistently holds scissors sideways or upside down despite reminders
  • Cannot cut along a bold straight line with any accuracy
  • Uses both hands to operate scissors (no bilateral division)
  • Shows extreme frustration or refusal during cutting tasks

At age 5:

  • Cannot cut out a simple shape (circle or square)
  • Cuts are consistently very jagged with no smooth segments
  • Elbow is raised high near the ear during cutting (indicates poor shoulder stability)
  • Cannot coordinate paper rotation with the helping hand

Early screening through your pediatrician or school's occupational therapist can rule out or identify underlying issues. Most scissor skill delays respond quickly to targeted activities.

Choosing the Right Scissors and Setup

Before starting any scissor activities, you need the right tools and a safe, comfortable setup. The wrong scissors or poor posture can turn a fun activity into a frustrating one.

Types of Scissors for Preschoolers

Spring-loaded scissors are the best starting point for ages 2-3. A small spring mechanism automatically reopens the blades after each squeeze, so the child only needs to focus on the closing motion. This reduces hand fatigue and builds confidence. Remove the spring once the child can open and close regular scissors independently.

Blunt-tip scissors with a 5-inch blade are the standard for ages 3-5. Look for molded handles that guide finger placement — one loop for the thumb, one larger loop for the index and middle fingers. Fiskars and Westcott both make reliable, inexpensive options.

Loop-handle scissors (sometimes called "training scissors") have a larger handle design that accommodates multiple grip styles. These are helpful for children who struggle with the traditional two-loop design. The extra space makes it easier to position fingers correctly without squeezing too tightly.

Left-Handed Scissors Guide

Approximately 10% of children are left-handed, and most receive right-handed scissors by default. This matters more than many people realize. Here is why:

When a left-handed child uses right-handed scissors, the upper blade blocks their view of the cutting line. They cannot see where they are cutting. This leads to crooked cuts, frustration, and the false belief that they are "bad at scissors." The solution is not simply flipping the scissors over — true left-handed scissors have the blades reversed so the cutting action works correctly for a left-to-right cutting motion.

What to look for:

  • Blades are reversed: the upper blade is on the left when the scissors are held in the left hand
  • The handles are shaped for left-hand comfort (some are truly ambidextrous, which is a compromise)
  • The cutting action feels smooth, not stiff or binding

Teaching tips for left-handed children:

  • Position the paper to the left of the child's body midline
  • Demonstrate with your own non-dominant hand, or use a video tutorial
  • Sit beside or across from the child (not on the right side, which blocks their view)
  • Celebrate left-handedness as a difference, not a difficulty

Proper Sitting Position and Hand Placement

Posture affects cutting ability more than most people realize. A child who is slumped, sitting too low, or reaching across their body will struggle regardless of their hand skills.

Ideal setup:

  • Feet flat on the floor (use a footstool if needed)
  • Hips pushed back in the chair, back relatively straight
  • Table at elbow height when seated
  • Paper positioned directly in front, slightly toward the cutting hand side

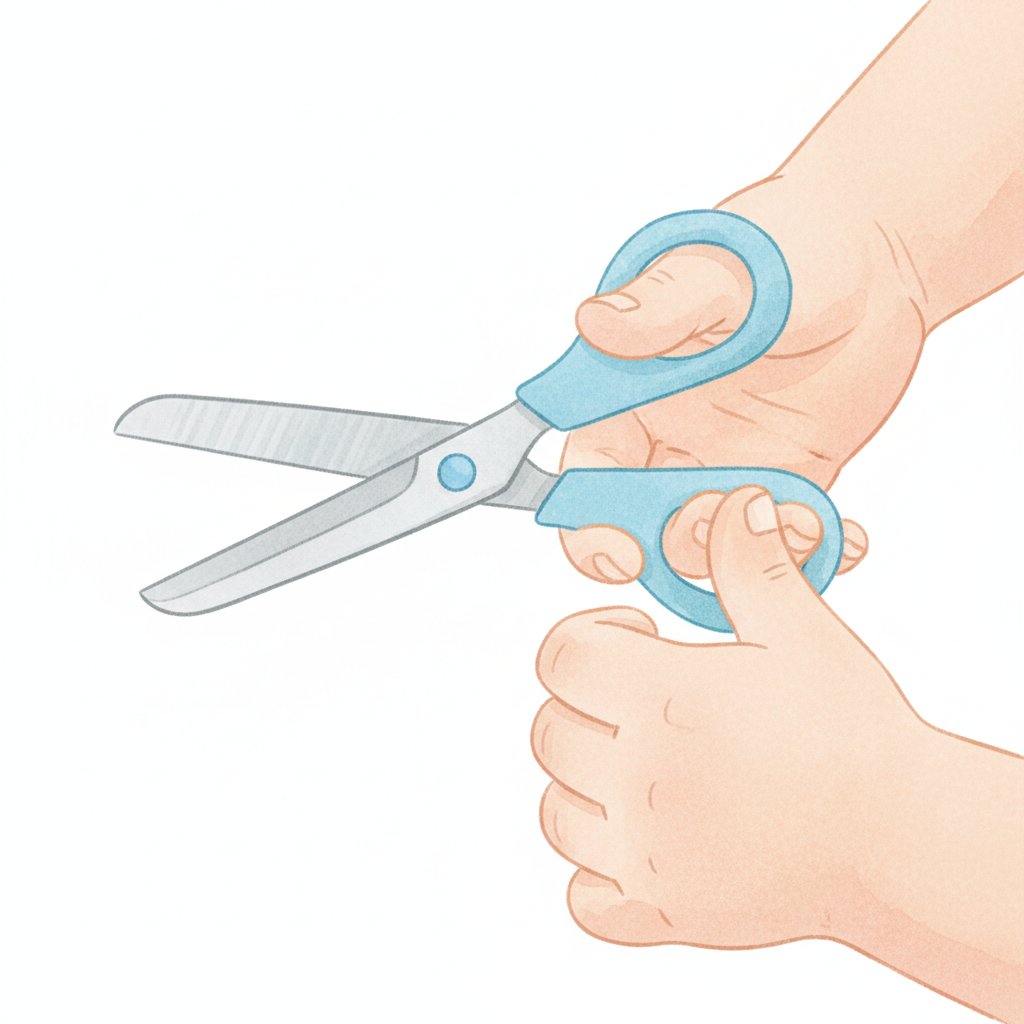
Correct grip (thumbs-up position):

  • Thumb goes in the small loop, facing upward
  • Index and middle fingers go in the large loop
  • Ring and pinky fingers curl into the palm for stability
  • Both thumbs (cutting hand and helping hand) face upward during cutting
  • Elbow stays at the child's side, not raised toward the ear

Teach the "thumbs on top" rule from day one: if both thumbnails are pointing up, the grip is correct. This simple visual check prevents the most common grip errors.

Proper scissor grip showing thumbs-up position

Safety Rules to Teach Before Starting

Before handing over scissors, establish these non-negotiable rules:

  1. Scissors stay at the table. Walking with scissors is never allowed. If you need to move, set them down first.
  2. Blades point away from your body. Always cut away from yourself, never toward your body or fingers.
  3. Pass scissors handles-first. When giving scissors to someone, hold the blades and offer the handles.
  4. Only cut the materials provided. Hair, clothing, books, and furniture are never cutting targets.
  5. Ask before cutting. In a classroom, children ask before getting scissors from the supply area.

Repeat these rules at the start of every cutting session until they become automatic. Most preschoolers internalize safety rules within 2-3 weeks of consistent reinforcement.

30+ Scissor Skills Activities Organized by Difficulty

These activities are arranged from easiest to hardest. Start at the level that matches your child's current ability and progress when they can complete an activity with confidence. Each activity lists the materials, steps, skill focus, and recommended age range.

Beginner Activities (Ages 2-3½)

These activities focus on the open-close motion of scissors, hand strengthening, and building comfort with the tool. No line-following required.

1. Playdough Snipping. Roll playdough into thin "snakes." The child snips the snake into small pieces. Skill focus: open-close motion, hand strength. Materials: playdough, safety scissors.

2. Straw Slicing. Cut drinking straws into bead-sized pieces. The rigid straw provides resistance that builds hand strength. Children love watching the pieces fly. Skill focus: grip strength, visual tracking. Materials: plastic drinking straws, scissors, a tray to catch pieces.

3. Scrap Paper Confetti. Provide small squares of colorful paper. The child snips the squares into tiny pieces. Use the confetti for a collage afterward. Skill focus: snipping motion, two-hand coordination. Materials: scrap paper, scissors, glue, background paper.

4. Nature Cutting. Collect thin leaves, flower petals, and grass blades. The child snips them into small pieces to create a nature collage. Natural materials offer varied textures and resistance levels. Skill focus: grip adjustment for different materials. Materials: collected nature items, scissors, glue, paper.

5. Paper Plate Fringe. Give the child a paper plate and let them snip around the entire edge to create a fringe. The curved edge provides a natural guide. Skill focus: continuous snipping, bilateral coordination. Materials: paper plate, scissors.

6. Playdough Haircuts. Push playdough through a colander or garlic press to create "hair." The child gives the playdough person a haircut. This is the single most requested activity in every preschool classroom I have seen it introduced in. Skill focus: sustained cutting, motivation. Materials: playdough, colander or garlic press, scissors.

7. Cardboard Strip Cutting. Cut cereal boxes into thin strips. Cardboard offers more resistance than paper, building hand strength. The child snips the strips into squares. Skill focus: hand strengthening. Materials: thin cardboard, scissors.

8. Sticky Note Snipping. Place a row of sticky notes on the edge of a table. The child snips each note off the table edge. The adhesive provides slight resistance and the child gets immediate visual feedback. Skill focus: snipping with a target. Materials: sticky notes, scissors.

9. Sponge Cutting. Provide new, dry sponges for cutting into pieces. The dense material provides excellent resistance for hand strengthening. Cut pieces can be used for sponge painting. Skill focus: grip strength, sustained squeezing. Materials: clean dry sponges, scissors.

10. Yarn and String Snipping. Cut yarn or string into small pieces. Use the pieces for collage or gluing activities. String requires more precision than paper because it shifts during cutting. Skill focus: visual tracking, helping hand stabilization. Materials: yarn or string, scissors, tray.

Cutting station setup with paper strips, scissors, and tray

Cut-and-assemble crafts that make scissor practice feel like play
Our Summer Crafts Seasonal Template Set includes five printable projects designed around cutting, folding, and assembling. Each template has bold cutting lines sized for preschool hands — so your child gets genuine scissor practice while creating something they are proud to display. One download, five projects, zero prep time.

Intermediate Activities (Ages 3½-4½)

These activities introduce line-following, continuous cutting, and the concept of cutting toward a target.

11. Bold Straight-Line Strips. Print or draw thick straight lines (½ inch wide, bold marker) on paper strips. The child cuts along each line from bottom to top. Start with short strips (3-4 inches) and increase length over time. Skill focus: continuous cutting, line tracking. Materials: printed cutting strips, scissors.

12. Stop-and-Cut Lines. Draw lines on paper that end at a sticker or dot. The child cuts along the line and stops at the marker. This teaches impulse control and motor planning. Skill focus: stopping accuracy, motor planning. Materials: paper with lines and stickers, scissors.

13. Fringe Cutting. Draw parallel vertical lines along the bottom edge of a paper strip. The child cuts up each line to create a fringe. Do not cut all the way to the top — leave a solid band at the top. Skill focus: parallel cutting, stopping at a line. Materials: paper with printed lines, scissors.

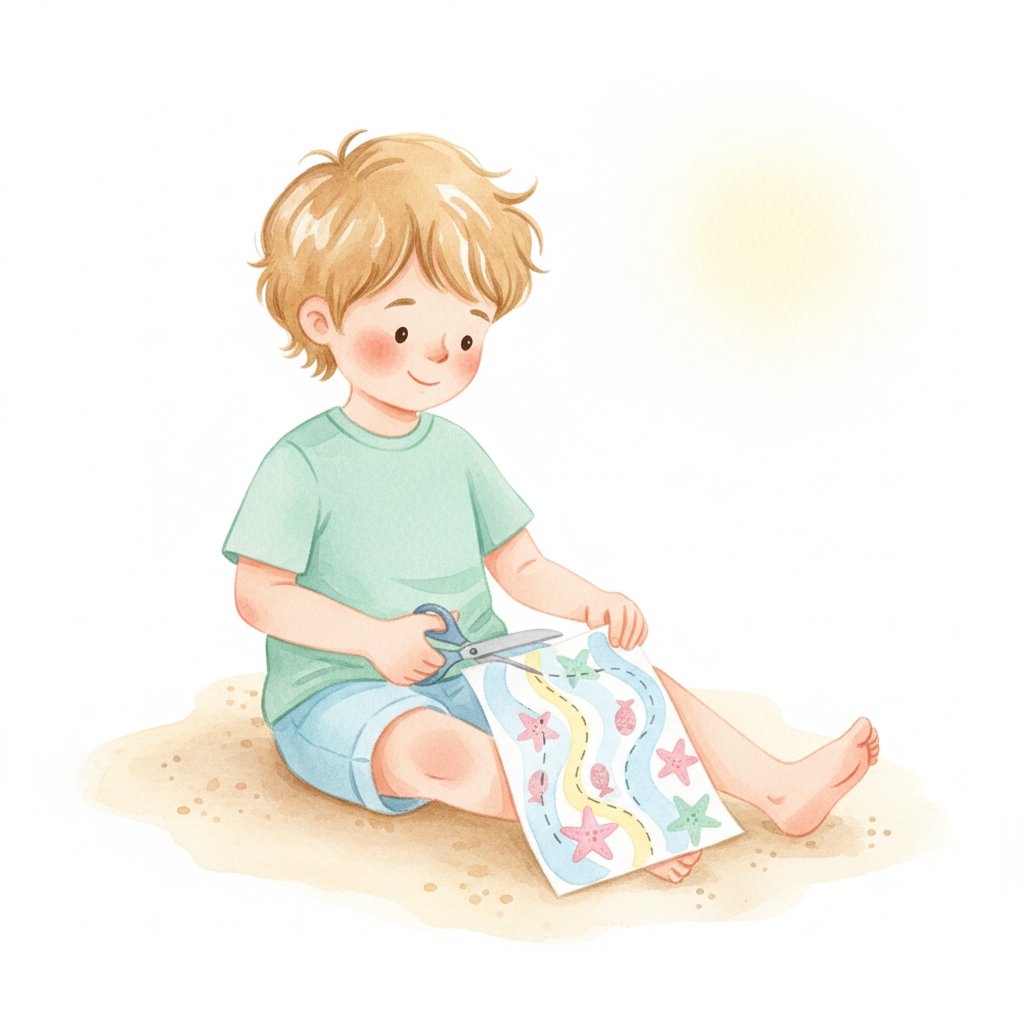
14. Wavy Line Paths. Draw gently curving lines from one side of the paper to the other. The child follows the wave with their scissors. The curves require subtle paper rotation. Skill focus: curve tracking, paper rotation. Materials: printed wavy lines, scissors.

15. Cutting to a Picture. Draw a line leading to a sticker, stamp, or small picture. The child cuts along the line to "reach" the picture. This adds motivation to the line-following task. Skill focus: motivated line tracking. Materials: paper with lines and stickers, scissors.

16. Shape Puzzles. Draw a simple shape (square, rectangle) on paper and have the child cut it out. Then use the cut-out as part of a picture — a house, a robot, a train car. Skill focus: corner navigation, purposeful cutting. Materials: printed shapes, scissors, glue, background paper.

17. Strip Collage Art. The child cuts multiple colored paper strips into pieces and glues them onto a background to create a mosaic or pattern. This combines cutting practice with creative expression. Skill focus: sustained cutting, artistic application. Materials: colored paper, scissors, glue, background paper.

18. Paper Chain Making. Cut strips of paper, loop each one through the previous loop, and staple or tape to create a chain. This project provides a reason to cut that feels purposeful. Skill focus: straight-line cutting with a purpose. Materials: colored paper, scissors, stapler or tape.

19. Cutting Along Tape Lines. Place strips of masking tape or washi tape on paper. The child cuts along the edge of the tape. The tape provides a raised tactile guide that is easier to follow than a printed line. Skill focus: tactile line tracking. Materials: tape, paper, scissors.

20. Snip-and-Sort. The child cuts colored paper strips and sorts the pieces by color into cups or sections of a tray. This combines scissor practice with color sorting. Skill focus: cutting with a cognitive task. Materials: colored paper, scissors, sorting cups.

Animal templates that turn cutting practice into a safari adventure
The Safari Animals Art Activity Pack gives your preschooler five watercolor-illustrated animal templates to color, cut out, and assemble. Each animal has clear cutting outlines — from gentle curves for beginners to detailed edges for advanced cutters. It is scissor practice disguised as a wild adventure.

Advanced Activities (Ages 4½-5½)

These activities challenge children with curves, corners, zigzags, and multi-step projects.

21. Zigzag Cutting Paths. Print zigzag lines that require the child to stop and change direction sharply. This builds motor planning and the ability to pivot the paper quickly. Skill focus: direction changes, motor planning. Materials: printed zigzag paths, scissors.

22. Circle Cutting Challenge. Draw circles of decreasing size (start with 6-inch diameter, progress to 3-inch). The child cuts out each circle. Continuous paper rotation is required — remind them to turn the paper, not the scissors. Skill focus: continuous rotation, curve control. Materials: printed circles, scissors.

23. Spiral Cutting. Draw a spiral starting from the outside edge of a paper plate, curving inward toward the center. The child cuts along the spiral line. The result becomes a hanging snake or spring decoration. Skill focus: sustained focus, continuous rotation. Materials: paper plate with spiral, scissors.

24. Cut-and-Paste Craft Projects. Provide a template with multiple pieces (for example, a paper robot with body, arms, legs, and head). The child cuts out each piece and glues them together on a background. Skill focus: multi-step cutting, project planning. Materials: printed template, scissors, glue.

25. Shape Cutting for Math Activities. The child cuts out geometric shapes (triangles, squares, circles) and uses them to build pictures or complete pattern activities. This connects scissor practice to math learning. Skill focus: precision cutting, cross-curricular application. Materials: printed shapes, scissors, background paper.

26. Maze Cutting. Print a simple maze. The child cuts along the correct path from start to finish, navigating dead ends and turns. This combines cutting with problem-solving. Skill focus: path navigation, motor planning. Materials: printed maze, scissors.

27. Animal Cut-Outs. Print simple animal outlines. The child cuts out the animal and adds details with crayons or markers. Use the animals for storytelling or habitat scenes. Skill focus: complex outline following. Materials: printed animal templates, scissors, crayons.

28. Layered Paper Scenes. The child cuts multiple elements (a house, trees, a sun, clouds) and arranges them on a background to create a scene. This is a multi-day project that builds sustained engagement. Skill focus: project planning, varied cutting challenges. Materials: colored paper, templates, scissors, glue, background.

Seasonal and Themed Cutting Activities

29. Heart Cutting for Valentine's Day. Fold paper in half, draw half a heart along the fold, and cut. Unfold to reveal a symmetrical heart. This introduces the concept of symmetry through cutting. Skill focus: cutting on a fold, symmetry. Materials: colored paper, scissors.

30. Snowflake Cutting. Fold a square of paper into quarters or eighths. Cut small shapes from the edges and corners. Unfold to reveal a unique snowflake. Skill focus: precision snipping, surprise result. Materials: white paper, scissors.

31. Pumpkin Shape Cutting (Fall). Cut out a pumpkin outline and add a stem. Children can cut facial features to make a jack-o'-lantern. Skill focus: shape cutting with details. Materials: orange and green paper, scissors, glue.

32. Flower Petal Cutting (Spring). Cut individual petals from colored paper and arrange them around a center circle. Layer different colors for a dimensional flower. Skill focus: repetitive cutting, assembly. Materials: colored paper, scissors, glue.

33. Turkey Feather Cutting (Thanksgiving). Cut feather shapes from construction paper and attach them to a turkey body template. Each feather can carry something the child is thankful for. Skill focus: curved shape cutting, purposeful project. Materials: construction paper, template, scissors, glue.

34. Star Cutting for Holidays. Draw and cut out star shapes in various sizes. Decorate with glitter, stickers, or markers and use as holiday ornaments. Skill focus: corner navigation on multi-point shapes. Materials: paper or cardstock, scissors, decorating supplies.

Free Printable Cutting Practice Worksheets

Alongside the hands-on activities above, structured cutting worksheets provide focused line-following practice. We have designed five progressive levels that you can download and print at home. Each level builds on the skills developed in the previous one.

Level 1: Straight Lines

Thick, bold straight lines spaced 1 inch apart on short strips. Perfect for children just starting to cut along a line. The wide spacing removes pressure and the bold lines are easy to see.

Level 2: Curved Lines

Gentle curves and waves that introduce the paper-rotation skill. Start with wide curves and progress to tighter bends. Each path leads from a start symbol to a finish symbol.

Level 3: Zigzag Lines

Sharp direction changes that require the child to stop, reposition the paper, and start cutting again. These build motor planning and the ability to manage corners — a prerequisite for cutting out shapes.

Level 4: Simple Shapes

Circles, squares, and triangles with thick outlines. The child cuts out each shape. These are ideal for children who have mastered straight and curved lines and are ready to manage complete shapes.

Level 5: Complex Cutting Paths

Intricate paths combining curves, corners, and spirals. These challenge older preschoolers (4½-5½) who have mastered all previous levels. Some paths form pictures when cut correctly — a butterfly, a star, a fish.

Progressive cutting worksheets showing five difficulty levels

For the full collection of printable cutting worksheets with themed activities, see our dedicated cutting practice worksheets guide, which includes animal themes, seasonal printables, and art project templates.

How to Use the Printables Effectively

  • Print on standard copy paper for beginners (thinner paper is easier to cut)
  • Switch to cardstock as skills improve (provides more resistance for hand strengthening)
  • Start each session at a level the child has already mastered for confidence, then introduce one new challenge
  • Place worksheets in sheet protectors and use dry-erase markers to trace lines before cutting — this adds a pre-cutting practice step

Troubleshooting Common Scissor Problems

Even with the right tools and activities, many children develop habits that make cutting harder than it needs to be. Here are the five most common problems and specific strategies to fix each one.

"My child holds scissors sideways"

A sideways grip usually means the child has not established the thumbs-up hand position. The wrist rotates so the palm faces down, which makes it impossible to see the cutting line.

Fixes:

  • Place a small sticker on the thumbnail of the cutting hand. Tell the child "keep the sticker facing up" while cutting. This gives them a concrete visual reminder.
  • Use scissors with a wider thumb loop that naturally guides the thumb into the correct position.
  • Practice the "thumbs-up" position without scissors first: have the child give two thumbs-up signs, then place scissors in their hand while maintaining that position.
  • Draw a smiley face on the child's thumbnail. "Keep Mr. Smiley looking at you while you cut."

"Their elbow flies up"

When a child raises their cutting elbow near their ear, it usually indicates weak shoulder stability. The shoulder girdle cannot support the arm in a horizontal position, so the elbow drifts upward.

Fixes:

  • Have the child tuck a small stuffed animal or beanbag under their cutting arm against their body. If the object falls, the elbow went up. This provides physical feedback.
  • Strengthen shoulder stability with wall push-ups, animal walks (bear crawl, crab walk), and wheelbarrow walking (you hold their legs, they walk on hands).
  • Ensure the table height is correct — if the child is sitting too low, reaching up to the table forces the elbow up.
  • Practice cutting while standing at a counter or easel. Some children maintain better arm position when standing.

"Cuts are jagged and choppy"

Jagged cuts happen when a child makes many tiny snips instead of smooth, continuous cutting strokes. This is the cutting equivalent of writing one letter at a time instead of flowing words.

Fixes:

  • Practice the "open-wide, cut-far" concept. Demonstrate opening the scissors all the way and making one long cut rather than many small snips.
  • Use the spring-loaded scissors trick: temporarily add a spring to encourage full opening between cuts. This builds the muscle memory of the full open-close cycle.
  • Cut thicker materials (cardboard, cardstock) that require more force per cut — this naturally encourages longer cutting strokes.
  • Draw dotted lines at wider intervals instead of continuous lines. The child cuts from dot to dot in one stroke, building continuous cutting habits.

"Their mouth moves with the scissors"

Many parents notice their child's mouth opening and closing in sync with the scissors. This is actually normal and not a problem. It reflects an immature motor pattern where the child's brain has not fully differentiated the hand and face muscle groups.

What to know:

  • This is common in children ages 2-4 and usually disappears on its own as motor control matures
  • It does not indicate a problem or delay
  • It is related to the same phenomenon that causes children to stick out their tongue when concentrating on drawing or writing
  • Do not draw attention to it or ask the child to stop — this creates anxiety without fixing the underlying motor pattern
  • The behavior naturally fades as the child's neurological system matures, typically by age 5

"They get frustrated and give up"

Cutting frustration usually stems from one of three causes: the activity is too hard, the session is too long, or the child has experienced too much failure.

Fixes:

  • Drop back one difficulty level. Always start a session with an activity the child can complete successfully. One minute of easy cutting builds more confidence than five minutes of struggling.
  • Keep sessions shorter than you think. Three minutes of happy cutting beats ten minutes of frustration. End the session while the child is still enjoying it.
  • Choose activities with immediate, satisfying results. Snipping playdough, cutting confetti, and making paper chains all produce visible, tangible outcomes quickly.
  • Use "I notice" language instead of corrections. Instead of "you're holding the scissors wrong," try "I notice your thumb wants to go to sleep — let's wake it up and put it on top."
  • Pair cutting with a preferred activity. "First cut three strips, then you can glue them into a collage." The reward is built into the process.
Ocean animal art projects that build fine motor skills layer by layer
The Ocean Animals Watercolor Art Activity Pack pairs beautifully with scissor skills practice. Each of the five sea creatures comes as an outline template your child colors, cuts out, and assembles — combining coloring, cutting, and pasting in one engaging project. The multi-step process builds sustained focus and gives cutting a creative purpose.

Tips for Parents vs Teachers

The principles of scissor skill development are the same at home and at school, but the implementation looks different. Here are practical strategies tailored to each setting.

Home Practice: Quick Daily Activities

Parents do not need special equipment or long blocks of time. The most effective home practice fits into existing routines.

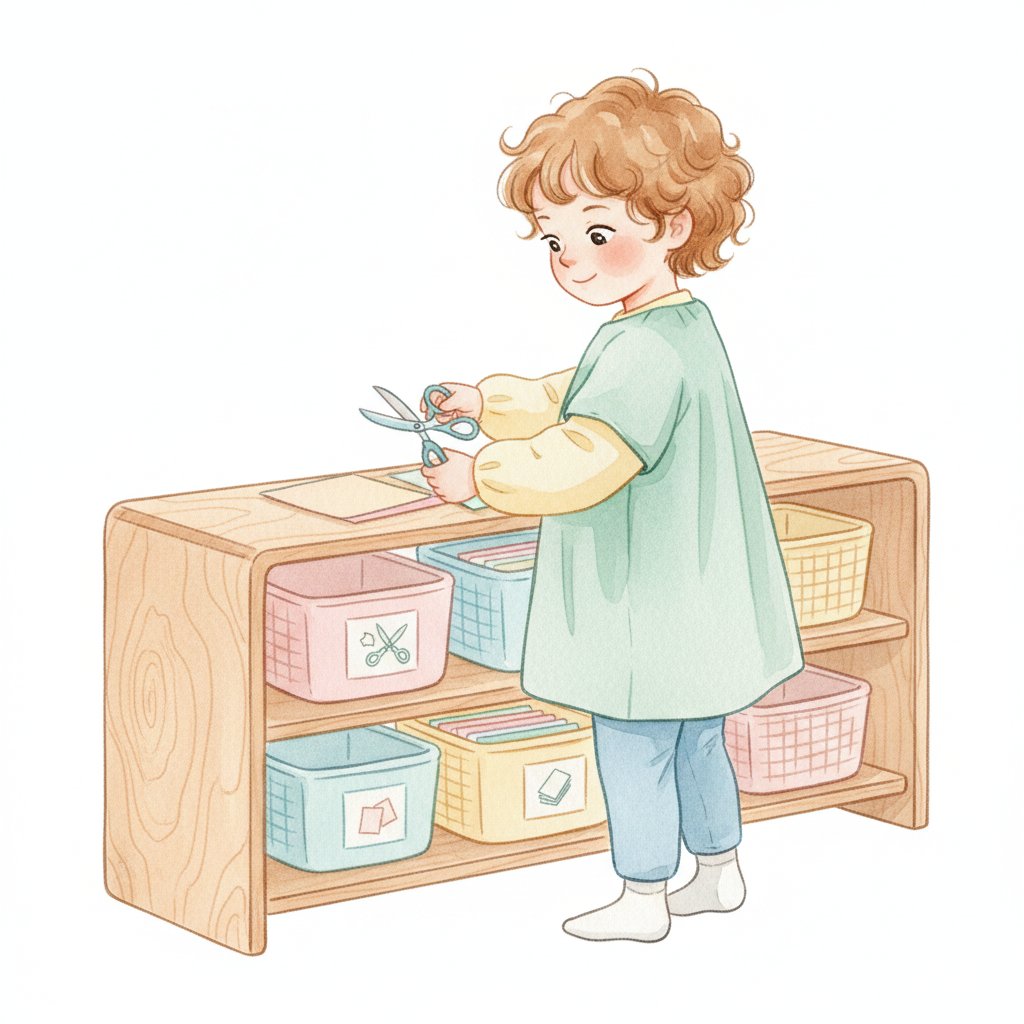
Kitchen table cutting station. Keep a small container with safety scissors, scrap paper, and a tray on a low shelf. Your child can access it independently during play time. The key is making scissors available, not scheduled.

5-minute sessions. Five minutes of daily cutting practice is more effective than one 30-minute weekly session. Keep it short and positive. A quick cutting activity before dinner, while you cook, builds consistency without pressure.

Real-world cutting opportunities. Let your child snip green beans before dinner, cut open packages, trim the edges of wrapping paper, or cut coupons. These authentic tasks give cutting a purpose beyond practice.

Progress tracking. Date and save one cutting sample per week. After a month, lay them out in order. The visual progress is motivating for both parent and child. You will see the progression from random snips to controlled line-following in a way that day-to-day observation misses.

Classroom Implementation: Fine Motor Center Setup

In a classroom, scissor activities work best as part of a structured fine motor center rotation.

Organized difficulty levels. Use color-coded folders or bins: green (beginner — snipping and straight lines), yellow (intermediate — curves and stopping), red (advanced — shapes and complex paths). Children choose their level or are assigned based on assessment.

Fine motor center rotation. Include scissors as one of 4-5 stations in your fine motor rotation. A typical rotation: cutting station, tracing station, tweezers/tongs station, lacing station, playdough station. Children rotate every 10-12 minutes.

Assessment tracking. Keep a simple checklist for each child: snips with scissors, cuts along a straight line, cuts curves, cuts out a shape, cuts complex paths. Date each milestone when observed. This takes 30 seconds per child per week and creates a useful progress record. Our fine motor skills activities guide provides additional assessment tools and activity ideas.

Cross-curricular integration. Connect cutting to other learning areas. Cut out letter pieces for phonics activities. Cut shapes for math lessons. Cut nature elements for science journals. When cutting serves a real classroom purpose, children practice more willingly.

How Scissor Skills Connect to Other Learning

Scissor skills do not develop in isolation. The same physical and cognitive abilities that make cutting possible also support other critical early learning skills.

Handwriting readiness. The tripod grip used for scissors is the same grip used for pencils. The hand strength, finger dexterity, and visual-motor integration developed through cutting transfer directly to writing tasks. Children who struggle with scissors often struggle with pencil control — and improving one improves the other.

Art and creativity. Cutting opens up a world of creative possibilities. Children who can cut independently can create collages, build paper sculptures, make masks, and design their own art projects. This independence fuels creative confidence. Pair cutting with our free printable coloring pages for complete art projects.

STEM activities. Cutting shapes for building projects, trimming materials for engineering challenges, creating templates for design tasks — scissor skills appear in STEM learning throughout elementary school. A child who can cut precisely at age 5 has a physical tool that supports scientific and mathematical exploration.

Independence skills. Beyond the classroom, scissor proficiency supports daily independence: opening food packages, cutting tags off new clothes, trimming tape or string. These small acts of independence build self-efficacy — the belief that "I can do things myself."

1.At what age should a child start using scissors?
Most children can begin supervised snipping around age 2 with safety scissors. Structured cutting activities — following lines and paths — typically start around age 3-4. The key is starting with easy materials like playdough and thin paper strips before progressing to printed worksheets. Hand dominance usually emerges between ages 2 and 4, which is why early scissor experiences often involve both hands.
2.How do I teach my left-handed child to use scissors?
Use true left-handed scissors where the upper blade is on the left side — this lets your child see the cutting line. Position paper to the left of their body midline. If you are right-handed, demonstrate by using your non-dominant hand or use a video tutorial. Left-handed scissors are not the same as ambidextrous scissors, which compromise the blade orientation and can still obstruct the cutting line for left-handed users.
3.What are signs my preschooler needs help with scissor skills?
Watch for a consistent sideways grip, inability to follow thick lines by age 4, very jagged cuts with no smooth segments, an elbow raised high during cutting, or frustration during cutting activities that does not improve with practice adjustments. If several of these signs appear together, an occupational therapy screening can provide targeted strategies. Most scissor skill challenges respond well to brief, focused intervention.
4.How long should cutting practice sessions be?
5-10 minutes for ages 2-3, and 10-15 minutes for ages 3-5. Short daily practice is far more effective than occasional long sessions. The hand muscles fatigue quickly in young children, so stop before frustration sets in. A child who cuts for five happy minutes today will be more willing to try again tomorrow than one who cut for twenty frustrating minutes.
5.Can scissor skills activities help with handwriting?
Yes. Scissor use strengthens the same hand muscles needed for pencil grip and control. Both cutting and writing require bilateral coordination and visual-motor integration. Children who build strong scissor skills often transition to handwriting more easily because the physical foundation — hand strength, finger dexterity, and eye-hand coordination — is already established.